WisWes Documentation
Everything that ships in your WisWes workspace — how the dashboard is laid out, what Tools, Flows, Intents, and A/B tests do, and how to extend the agent to any system your store talks to.
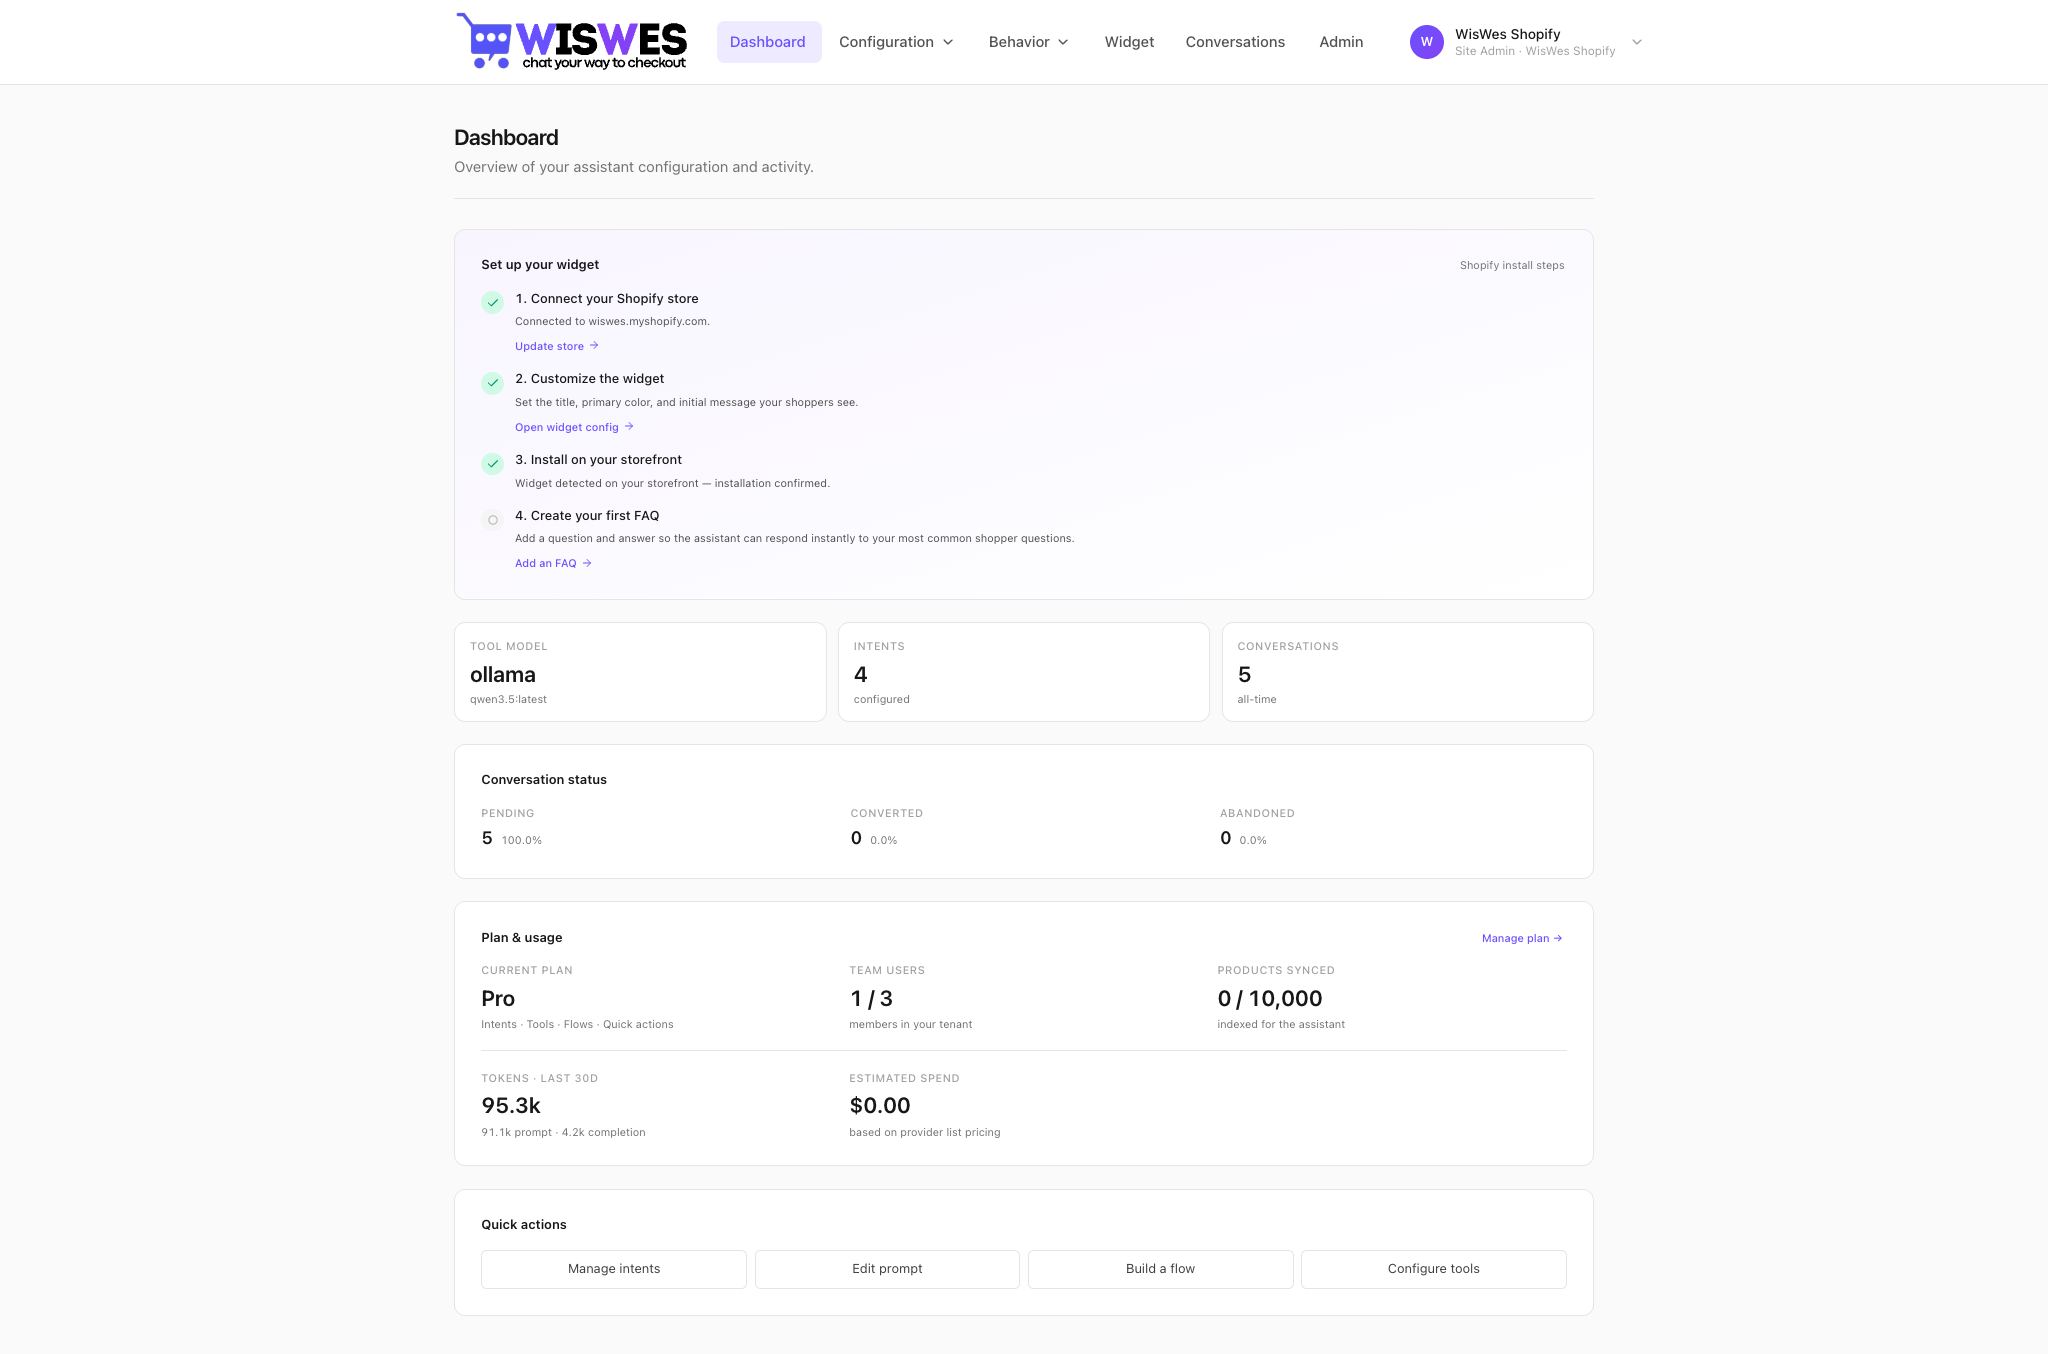
Dashboard
The landing page at app.wiswes.com is a single dashboard. The left-hand nav groups configuration, behavior, experiments, channels, observability, and administration.
Tool model
Under Configuration → Model you pick which LLM runs tool calls and classification for the agent. Wes supports two execution modes:
Cloud (default) — hosted frontier models
Claude (Opus / Sonnet / Haiku), OpenAI (GPT-4o, o4), or any OpenAI-compatible provider. Best for production — no infra to run, strong tool-call accuracy. You pay per token, pricing on the home page.
BYO key — your own provider account
Paste your Anthropic or OpenAI API key. Traffic hits their endpoints directly and your enterprise billing picks up the tab. WisWes still pays for the orchestration (routing, retries, tracing) — you just own the LLM spend.
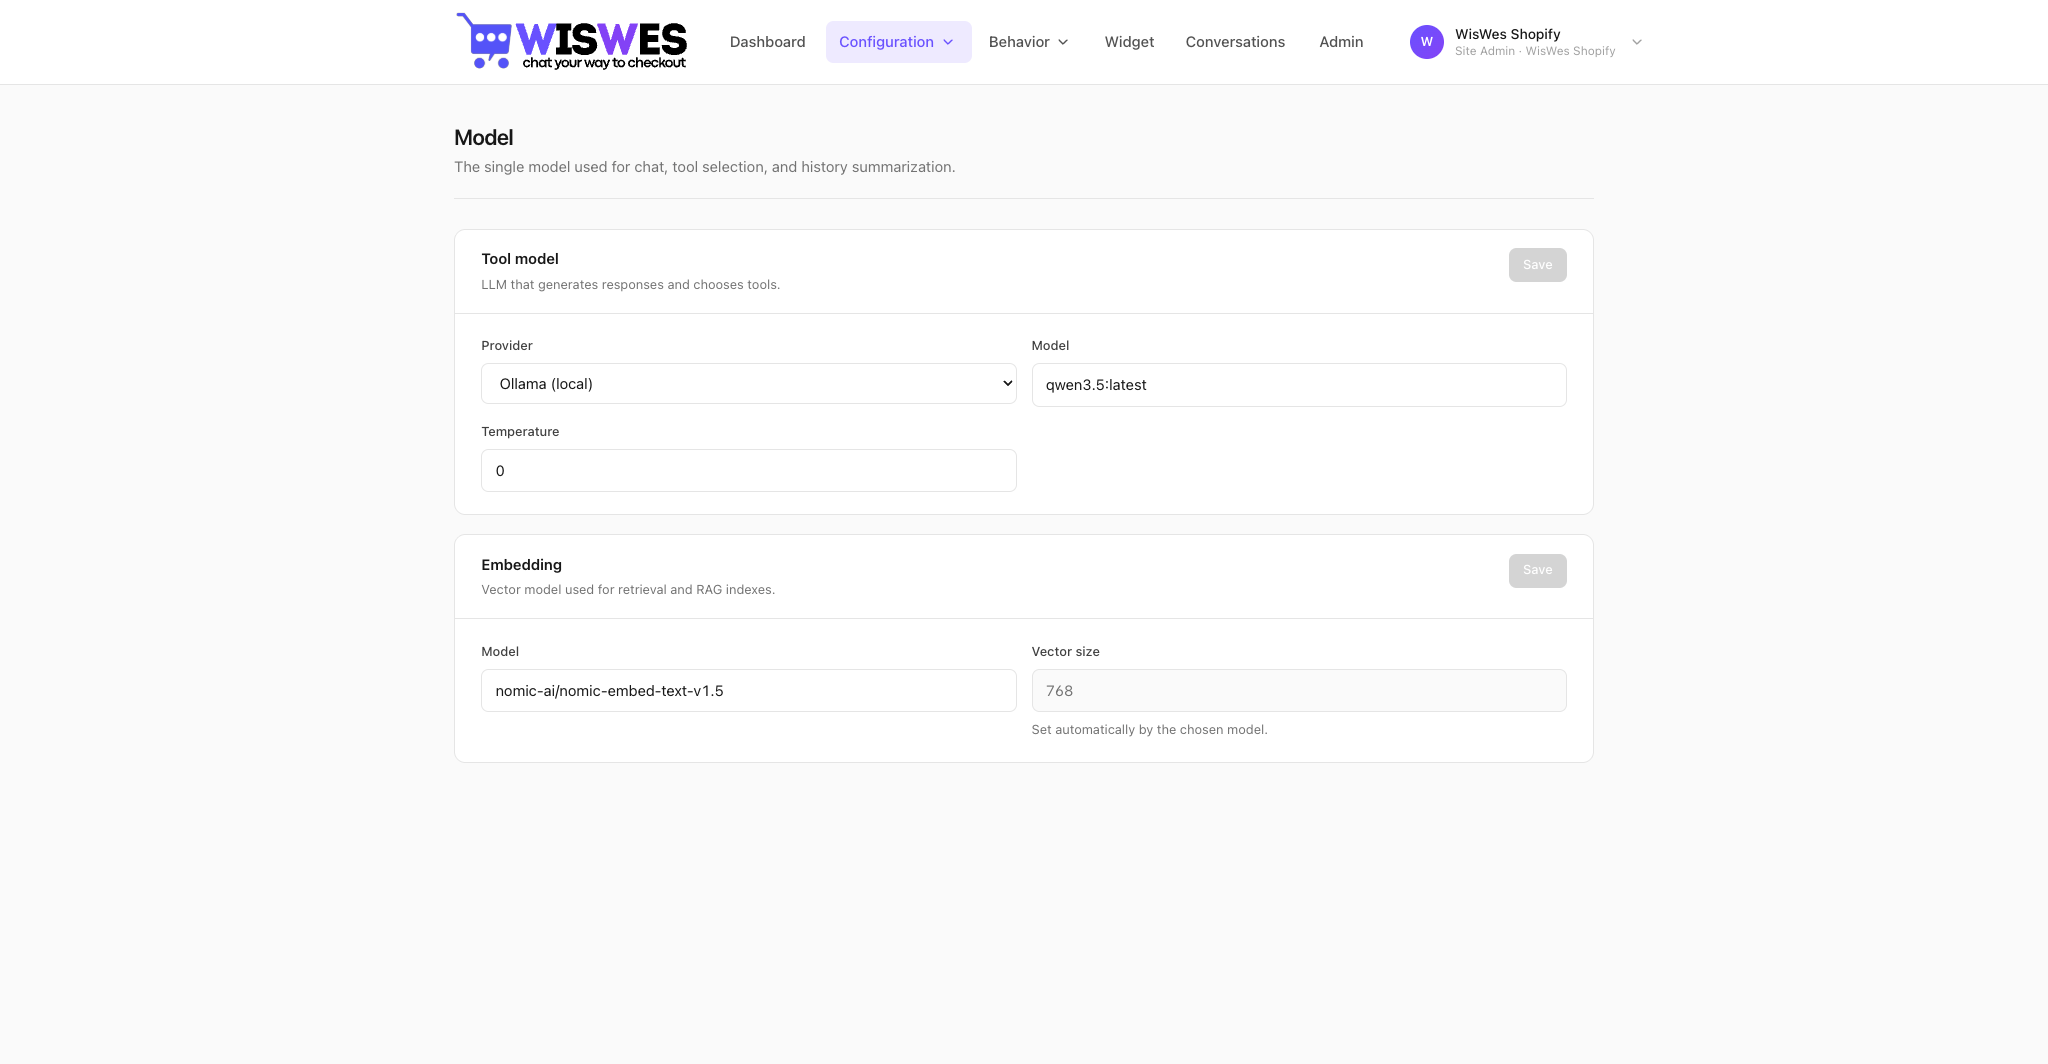
What is embedding
Embedding turns a block of text (a policy, a product description, a past conversation) into a vector — a numeric fingerprint the agent uses to find similar content at query time. In WisWes, embeddings power:
- Retrieval-augmented answers — policies and FAQ docs are embedded; when a shopper asks "what's your return window?" Wes looks up the closest passage in sub-millisecond time before answering.
- Intent matching — each intent you train is embedded. Incoming messages are embedded the same way and matched by cosine similarity.
- Product semantic search — product descriptions are embedded so the agent can find "quiet noise-cancelling headphones for meetings" even if those exact words aren't in your catalog.
Embeddings live in Qdrant. The embedder itself is configurable under Model — default is text-embedding-3-small via OpenAI.
System prompt
The system prompt is where you teach Wes your brand voice, refusal policy, escalation rules, and house style. It's plain English — no YAML, no flow diagrams. Edit, save, and the next conversation uses the new version.

Typical prompt structure
You are Wes, the shopping assistant for {{store.name}}.

## Voice
- Friendly, concise, never pushy
- Address the shopper by first name if available
- Use the shopper's language; if unclear, default to English

## Rules
- Never promise a delivery date you haven't verified via a tool
- Never apply discounts that aren't in the configured promos
- If asked for a human, call handoff:escalate

## Tools
You have access to: product:search, product:get, cart:*, order:*, customer:info.
Prefer product:search for discovery, product:get for exact SKU lookups.

## Shop context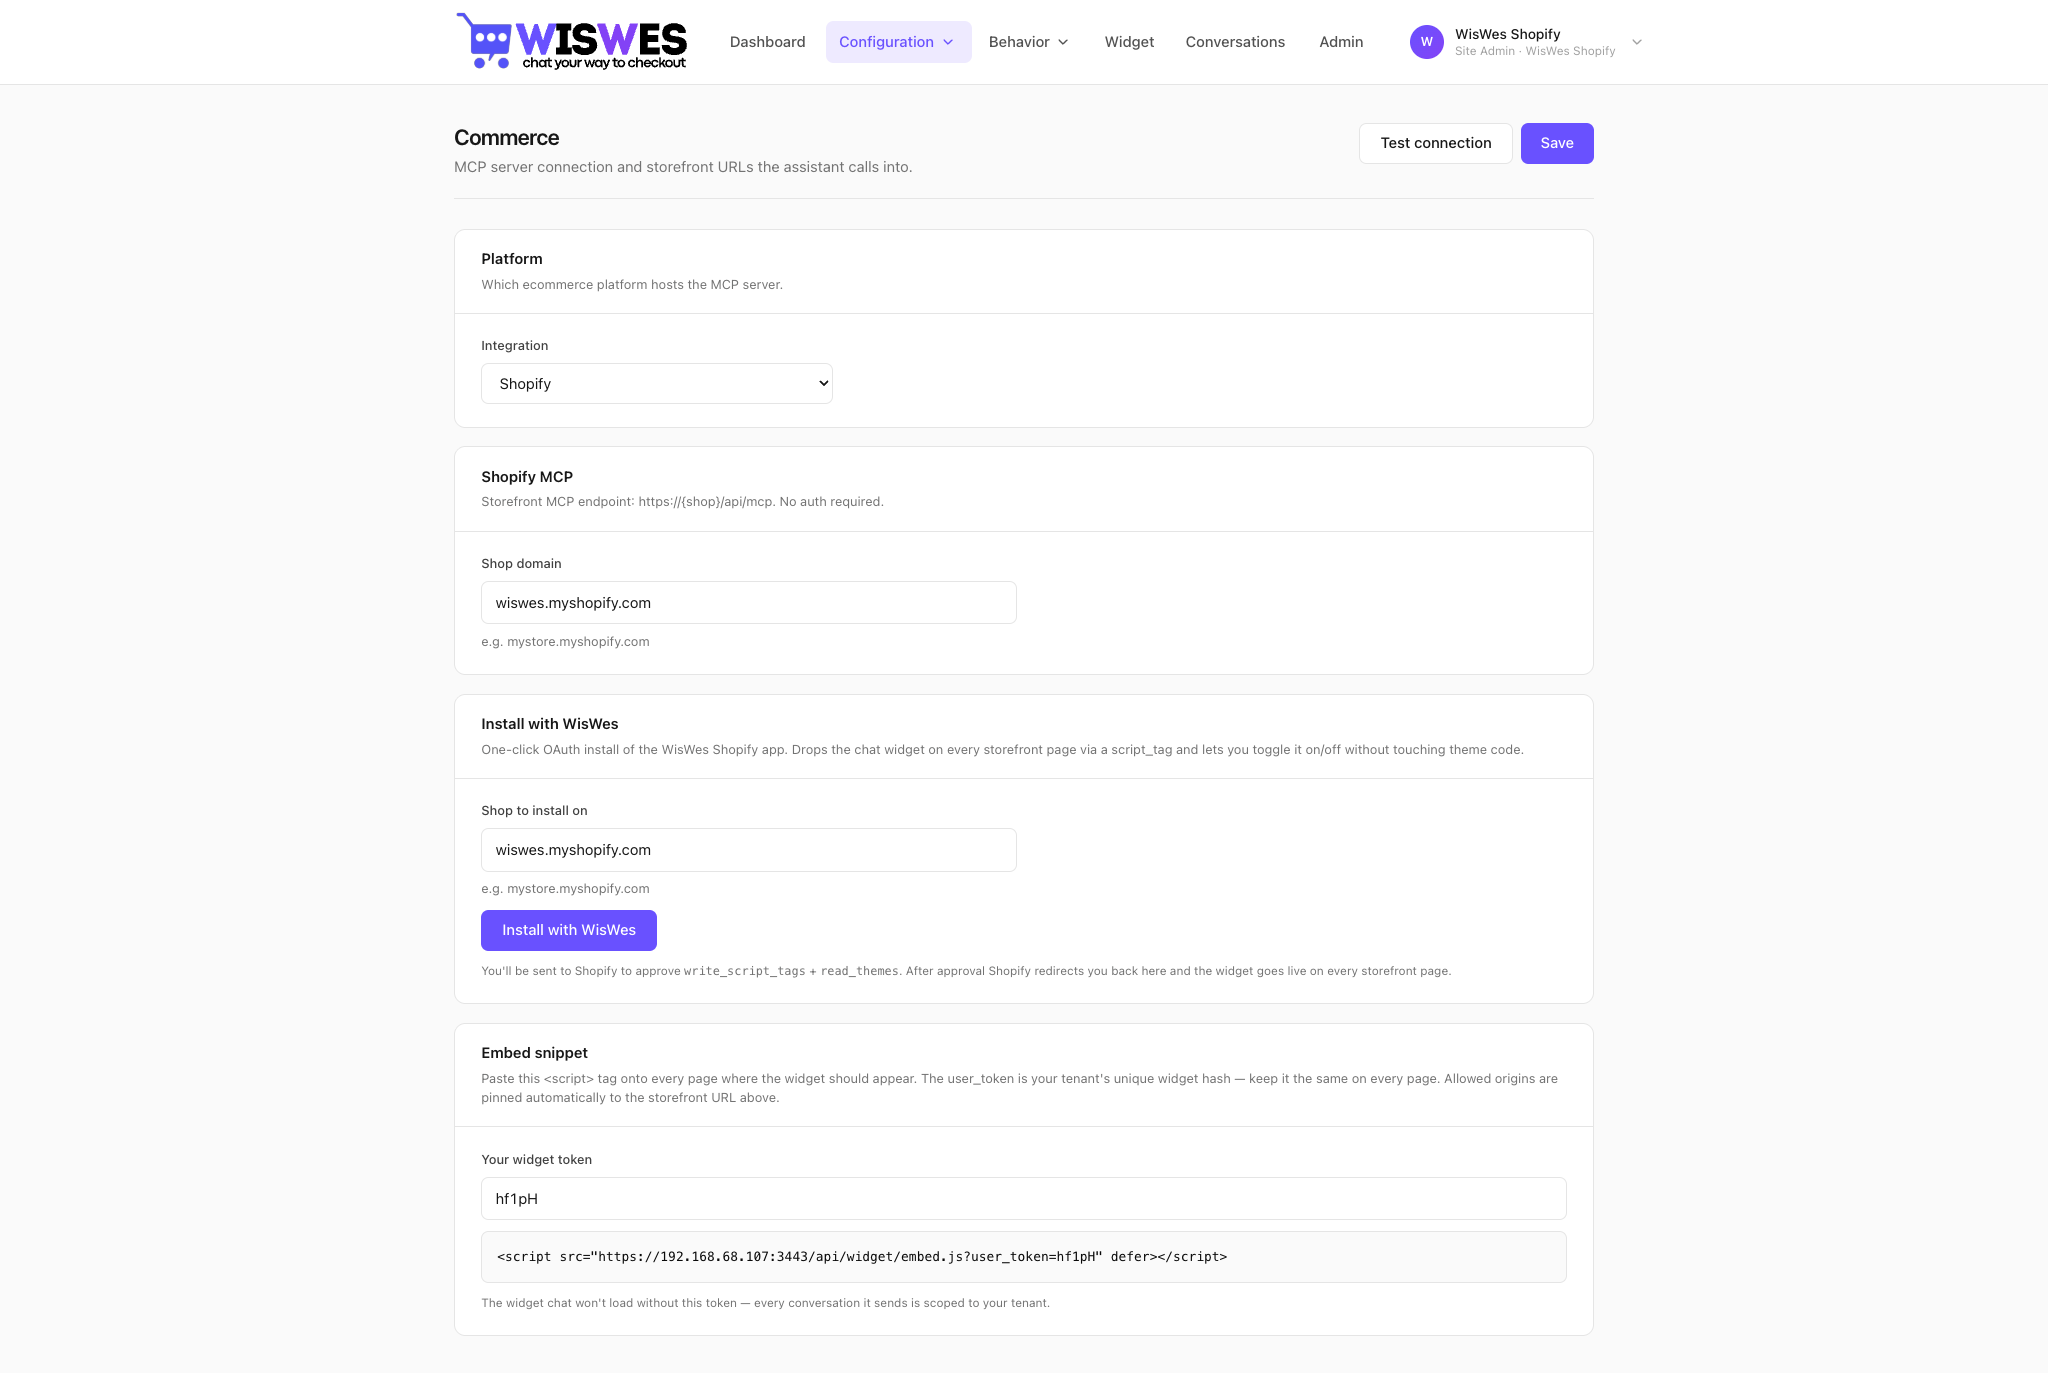
{{store.policies}}{{...}} is replaced at runtime from the conversation context (store name, shopper profile, cart, recent intent).How to connect commerce
Configuration → Commerce is where you wire WisWes to your store. One of:
- Magento 2 — install the
wiswes/module-mcpComposer package, click Install from the Magento admin to mint a shared secret, you're live. Full guide at /install/magento. - Shopify — connect your
myshopify.comdomain in the WisWes commerce config and paste the embed snippet intotheme.liquid. Full guide at /install/shopify. - Custom MCP server — any stdio or HTTP MCP endpoint. Shopware / BigCommerce adapters ship as custom MCP servers we build on request.
- REST init endpoint — for the widget to know the current shopper's cart and identity, WisWes calls a platform-specific
/chat_ai/chat/initializeendpoint on page load. The endpoint returns { customer_id, cart_id, locale, currency }.
Minimal Magento connection
# 1. Install the module
composer require wiswes/module-mcp
bin/magento module:enable WisWes_MCP
bin/magento setup:upgrade
bin/magento setup:di:compile
bin/magento cache:flush

# 2. From Magento admin: Stores → Configuration → WisWes Chat → Install
#    Magento mints a shared secret and redirects you to the WisWes dashboard,
#    which records the secret on your tenant. No CLI server to run — the MCP
#    endpoint is served by Apache/PHP-FPM at https://<your-magento>/mcp.

# 3. (Optional) push the catalogue to the WisWes vector index immediately
bin/magento wiswes:products:push
Intents — what they are + how to add them
An intent is a named bucket of example phrases that mean the same thing. The first-turn classifier embeds the shopper's message and matches it against your intents. Matched intents can trigger a Flow, change the system prompt variant, or unlock specific tools.
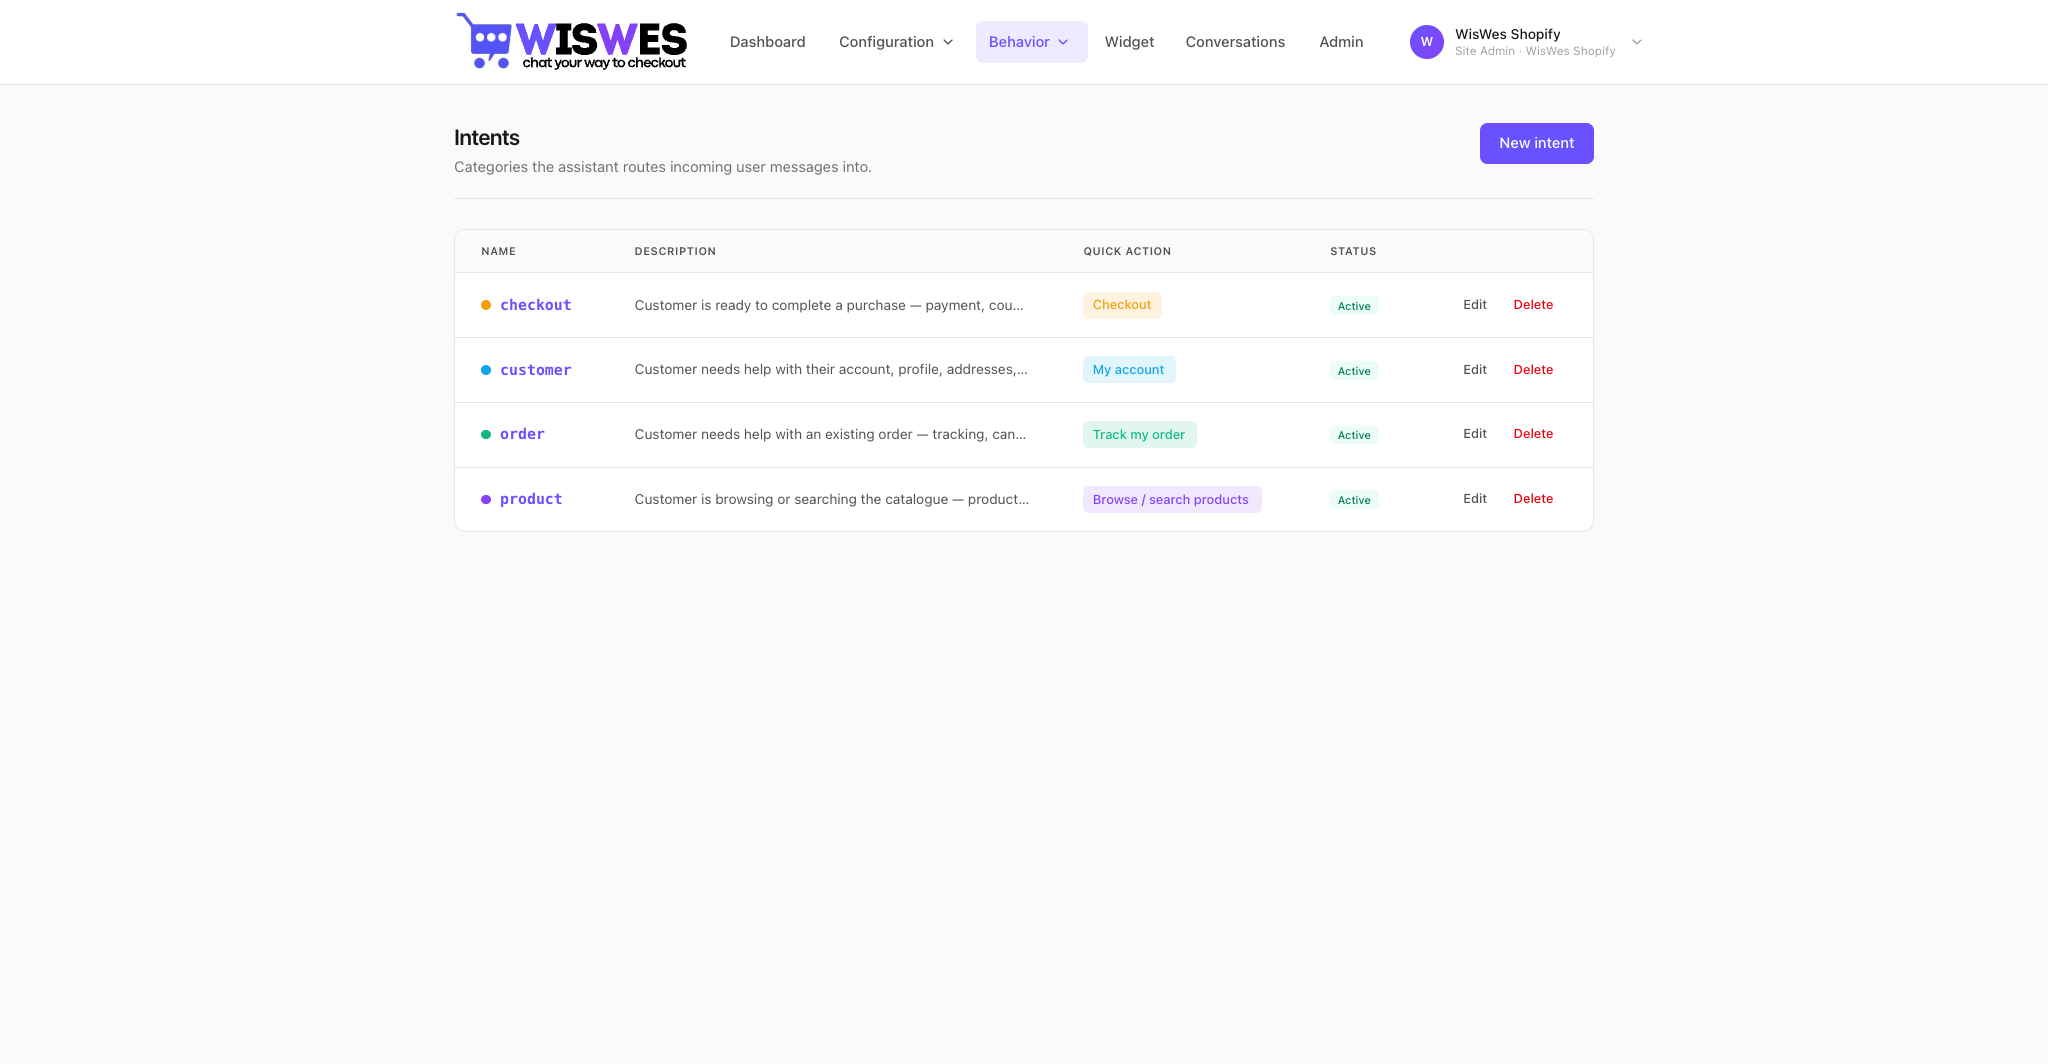
Adding an intent
- Open Behavior → Intents and click New intent.
- Name it in snake_case —
order_tracking,size_guidance,return_request. - Add 6–10 example phrases. Cover formal, casual, typos, and at least one foreign-language version if you sell abroad.
- (Optional) pick a Flow to trigger when this intent matches with confidence ≥ 0.82.
- Save. No retrain step — embeddings are recomputed synchronously.
Tools — add via MCP, override, limits
Tools are the agent's actions — anything from product-filter tocrm-loyalty-tier. In WisWes, tools always come from an MCP server: the Magento module we ship, a custom server you write, or any MCP-compliant endpoint.
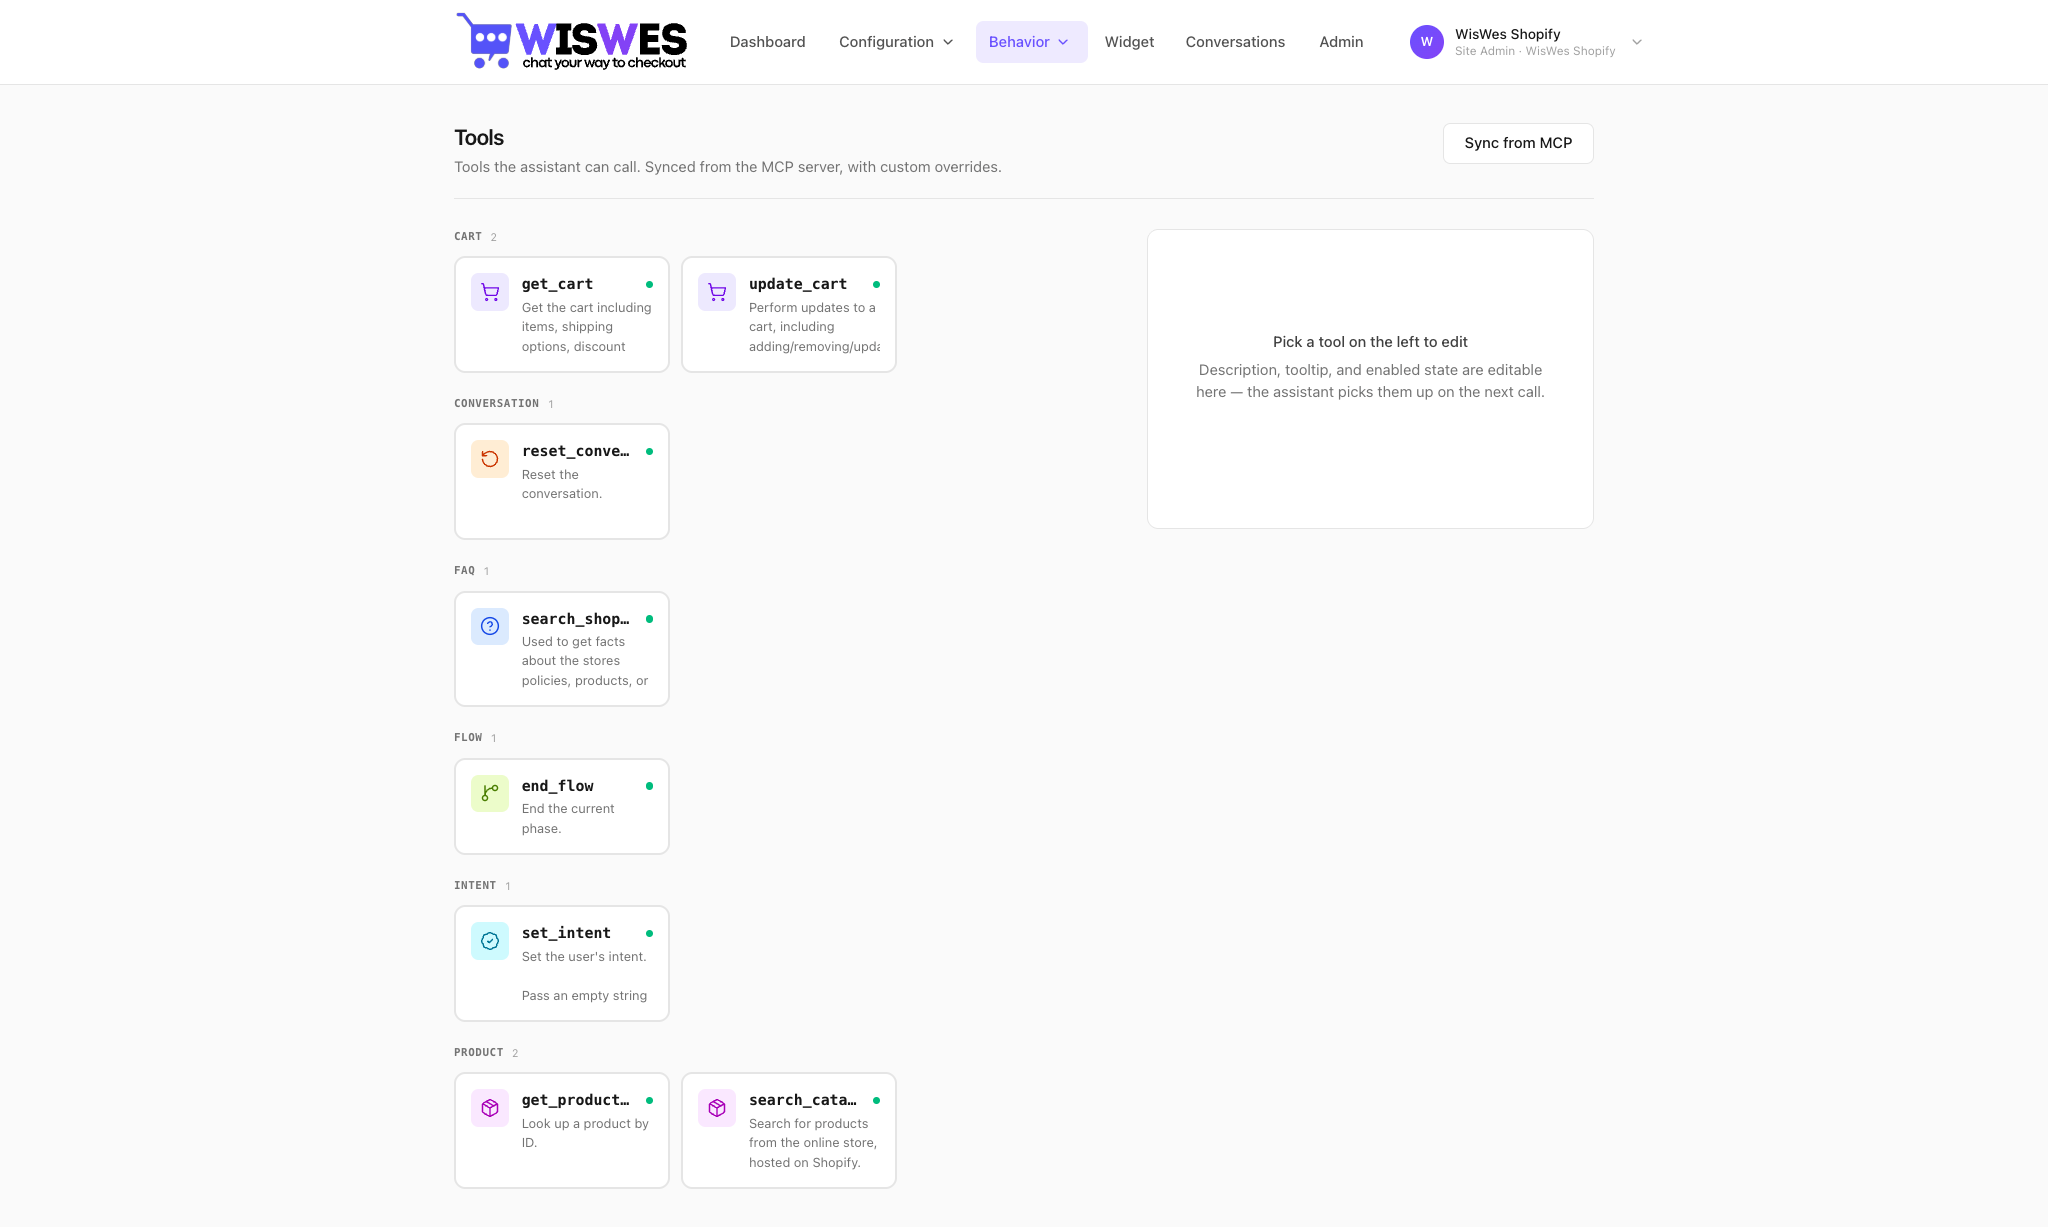
Adding a tool via MCP
Drop a class into your MCP server and annotate it. Here's a minimal example for the Magento module — a custom loyalty-points lookup:
<?php
declare(strict_types=1);

namespace WisWes\MCP\Mcp\Tool\Loyalty;

use PhpMcp\Server\Attributes\McpTool;

class LoyaltyPointsTool
{
    public function __construct(
        private readonly \Acme\Loyalty\Api\PointsClient $client,
    ) {}

    #[McpTool(
        name: 'loyalty-points',
        description: 'Returns the authenticated customer\'s loyalty tier and current points balance. Arguments: none. Customer access token required.'
    )]
    public function points(): array
    {
        $snapshot = $this->client->snapshotForCurrentUser();
        return [
            'tier'   => $snapshot->getTier(),
            'points' => $snapshot->getBalance(),
            'tier_progress' => $snapshot->getProgressToNext(),
        ];
    }
}
After bin/magento setup:di:compile && bin/magento cache:flush, the tool appears in WisWes under Tools within seconds — the MCP endpoint is served by Apache/PHP-FPM, so a deploy is enough; no separate process to restart.
Overriding an action
You can change what the agent sees without editing PHP. On any tool row, clickOverride — you can:
- Edit the description the model reads (e.g. tighten when to call it, add preconditions).
- Pin argument defaults (force
perPage=25everywhere). - Whitelist/blacklist fields in the response (strip PII before handing back to the model).
- Wrap in a pre-action hook — call a webhook before the tool fires.
Limits
- Max 64 tools per workspace the model sees in one conversation.
- Max 16 tool calls per conversation turn.
- Tool call timeout: 20 s — raise in Model settings if your MCP is slow.
- Per-tool rate limit configurable (default 60 calls/min/conversation).
Flows — scripted paths the agent drives
A Flow is a graph of steps. Each step has a role (user-facing text, tool call, classification, handoff) and branching rules. Flows are how you express "after the shopper is identified, check loyalty tier and show VIP pricing if eligible"without hand-written prompt engineering in every conversation.
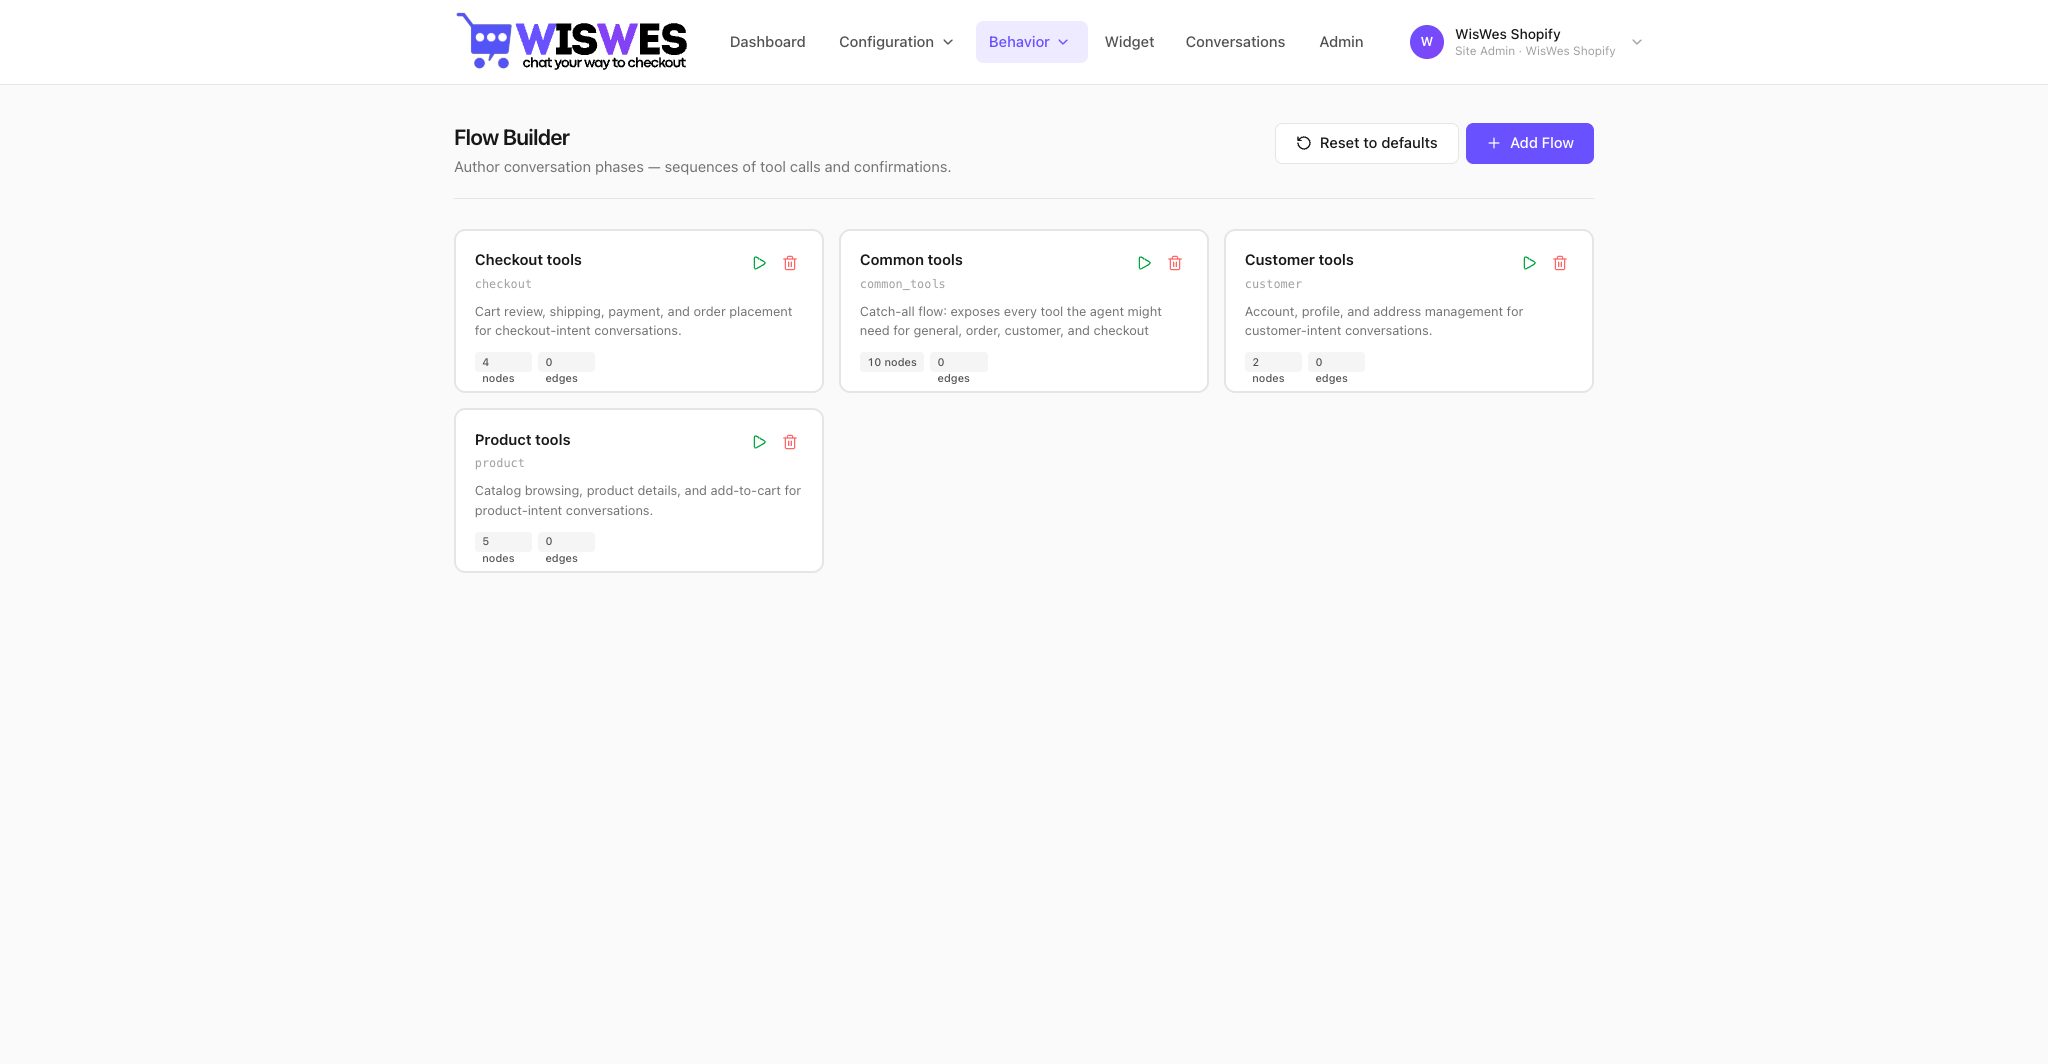
Adding a flow via MCP (example: refund wizard)
You don't write Flows in code — they live in the database (flows +flow_steps). But the tools the Flow calls come from MCP. Example: a refund Flow that uses order:info, order:update, and a newrefund:initiate:
#[McpTool(
    name: 'refund:initiate',
    description: 'Starts a refund for the given order. Arguments: orderId (int), reason (string), amount (float, optional — omit for full refund). Admin token required.'
)]
public function initiate(int $orderId, string $reason, ?float $amount = null): array
{
    $refund = $this->refundService->create($orderId, $reason, $amount);
    return [
        'refund_id' => $refund->getId(),
        'status'    => $refund->getStatus(),
        'amount'    => $refund->getAmount(),
        'eta_days'  => $refund->getEtaDays(),
    ];
}
Overriding a flow step action
The same override panel that works for Tools also works inside a Flow step. You can hard-pin argument defaults (e.g. force notify=true on allorder:update calls in the Refund Flow) without touching MCP source.
Limits
- Max 32 steps per Flow.
- Max 4 nested Flows (a Flow calling a Flow).
- Max 90 s wall-clock per Flow — steps beyond that surrender back to the free-form agent.
- Steps that mutate state (cart, order, customer) must declare
side_effect: true— the conversation replay UI will mark them read-only so a CS rep can't accidentally re-fire them.
FAQs — teach the assistant your business answers
FAQs are curated question/answer pairs that capture how your business actually replies to recurring shopper questions: return windows, sizing rules, store hours, warranty policy, the wording of your delivery promise. The assistant retrieves the closest match at query time and uses it as ground truth — so answers stay on-brand and stop drifting into LLM hallucinations.
Adding entries by hand
- Open Behavior → FAQs (or, on the Basic plan, the standalone FAQs menu).
- Click New entry.
- Write the question the way a shopper would phrase it.
- Write the canonical answer in your brand voice — links and short paragraphs are fine.
- (Optional) add tags so you can filter the list later, e.g.
returns,shipping. - Save. Embeddings are recomputed synchronously — the entry is searchable immediately.
Bulk import via CSV
On the FAQs page click Import CSV to load many entries at once. The file is parsed server-side, embedded, and indexed in one shot.
File format
- First row must be the header line:
question,answer,tags. questionandanswerare required.tagsis optional.- Tags use a pipe to separate values, e.g.
billing|invoices. - Save the file as UTF-8. Wrap any cell that contains commas, quotes, or newlines in double quotes; escape internal double quotes by doubling them (
""). - One row per Q&A pair. Empty rows are skipped, malformed rows are reported back per-row.
Example
question,answer,tags
What is your return policy?,"Returns are accepted within 30 days of purchase.",returns|policy
How do I track my order?,Use the link in your shipping confirmation email.,shipping
"Do you ship internationally?","Yes, we ship to over 40 countries.",shipping|international
Download faq-sample.csv and edit it in Excel, Numbers, or Google Sheets — just remember to export back as UTF-8 CSV.
Why it matters
- Accuracy: the model quotes your wording instead of inventing one.
- Speed to ship: answer a new policy question in 30 seconds, no deploy.
- Per-tenant scope: each workspace owns its own FAQ index — your answers, your data.
- Always available: FAQs are part of every plan, including Basic.
Products — semantic catalogue search
The product:search tool finds products by meaning, not keyword. A shopper saying "something tart for a kid's birthday" matches a product whose description mentions sour fruit cake, party-friendly even though none of those exact words appear in the query. Embeddings live in a tenant-scoped Qdrant collection, fully isolated from other workspaces.
product:search the assistant uses- Pro / Enterprise + connected commerce backend: the live MCP tool fronted by your Magento (or other) catalogue — always-fresh inventory, prices, and SKUs straight from the source of truth.
- Basic plan, or no commerce backend connected: the local semantic version backed by the products you index here. Same tool name, same shape, no live inventory.
Two payloads per product
Every entry has two halves that the assistant treats very differently:
- Metadata — free-form text that builds the search embedding. The LLM never sees this directly; it's the "by which the product is found" payload. Pack it with anything a shopper might phrase: descriptions, flavour notes, occasions, materials, configurable option labels, dietary tags, use cases.
- Retrieval — a structured
{url, sku, name, min_price}dict returned to the LLM verbatim when the row matches. Keep it minimal: every retrieved product contributes to the LLM's context window, and longer retrieval payloads directly increase your model API spend.
Adding products by hand
- Open Knowledge → Products (or, on Basic, the standalone Products menu).
- Click Add product.
- Fill in the Metadata textarea — anything you want shoppers to be able to find this product by, in any phrasing.
- Fill in the four retrieval fields:
name,sku,url,min_price. These are what the assistant cites in the chat reply. - Save. The embedding is recomputed synchronously — the entry is searchable immediately.
Bulk import via CSV
On the Products page click Import CSV to load many entries at once. Up to 20,000 rows per file (the per-tenant plan cap still applies).
File format
- First row must be the header line:
metadata,url,sku,name,min_price. metadatais required — it's what the embedding is built from. The other four columns are returned verbatim to the LLM when this row matches.- Save the file as UTF-8. Wrap any cell that contains commas, quotes, or newlines in double quotes; escape internal double quotes by doubling them (
""). - One row per product. Empty rows are skipped, malformed rows are reported back per-row.
Example
metadata,url,sku,name,min_price
"Tart, fruity. Great for kids' birthdays. Vegan option.",https://shop.example.com/sour-apple,SKU-001,Sour Apple Cake,$24.99
"Rich dark chocolate. 70% cacao. Gluten-free.",https://shop.example.com/dark-choc,SKU-002,Dark Chocolate Slab,$12.50
Plan limits
- Basic: up to 100 indexed products.
- Pro: up to 10,000 indexed products.
- Enterprise: unlimited.
Cost considerations
Each chat that retrieves products pays for those products in input tokens. A 50-word retrieval payload across the top 3 matches is ~150 tokens added to every relevant turn. Keep retrieval lean: name + sku + url + price covers most shopping intents without bloating context. If you find yourself wanting to stuff long descriptions into retrieval, push them into metadata instead — the search will still find the product by them, but they won't cost tokens at chat time.
A/B testing
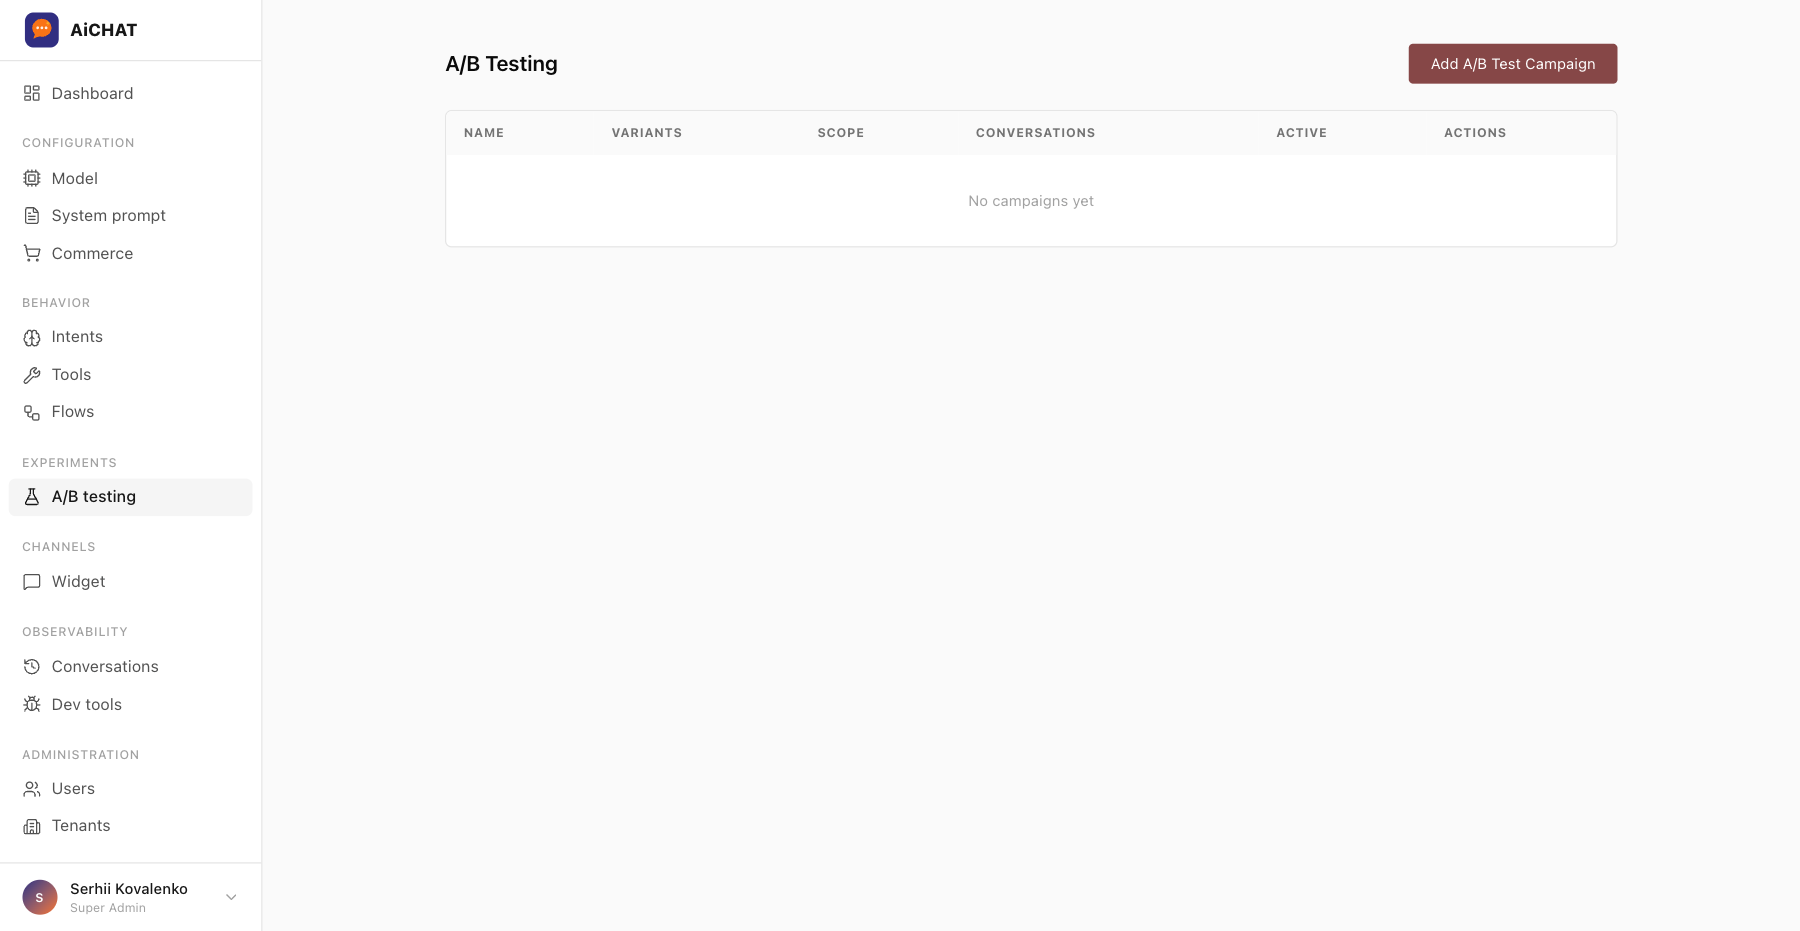
Creating a campaign
- Experiments → A/B testing → New campaign.
- Pick what you're varying: system prompt, Flow, tool description, model (e.g. Sonnet vs Haiku), or personalized promo strategy.
- Define the metric: conversion rate, AOV (avg order value), CSAT, handle time, or a custom event emitted by the widget.
- Set the traffic split (default 50/50) and optional audience (logged-in only, country, VIP tier).
- Start. Routing is deterministic by
session_id, so the same shopper always sees the same variant.
Validating results
The campaign card shows, for each variant:
- Traffic (sessions assigned) and confidence interval.
- Metric value in real money / real percentage points.
- Relative lift vs control and a Bayesian "probability this variant is best".
- Secondary-metric dashboard (so a prompt change that lifts conversion but tanks CSAT is caught).
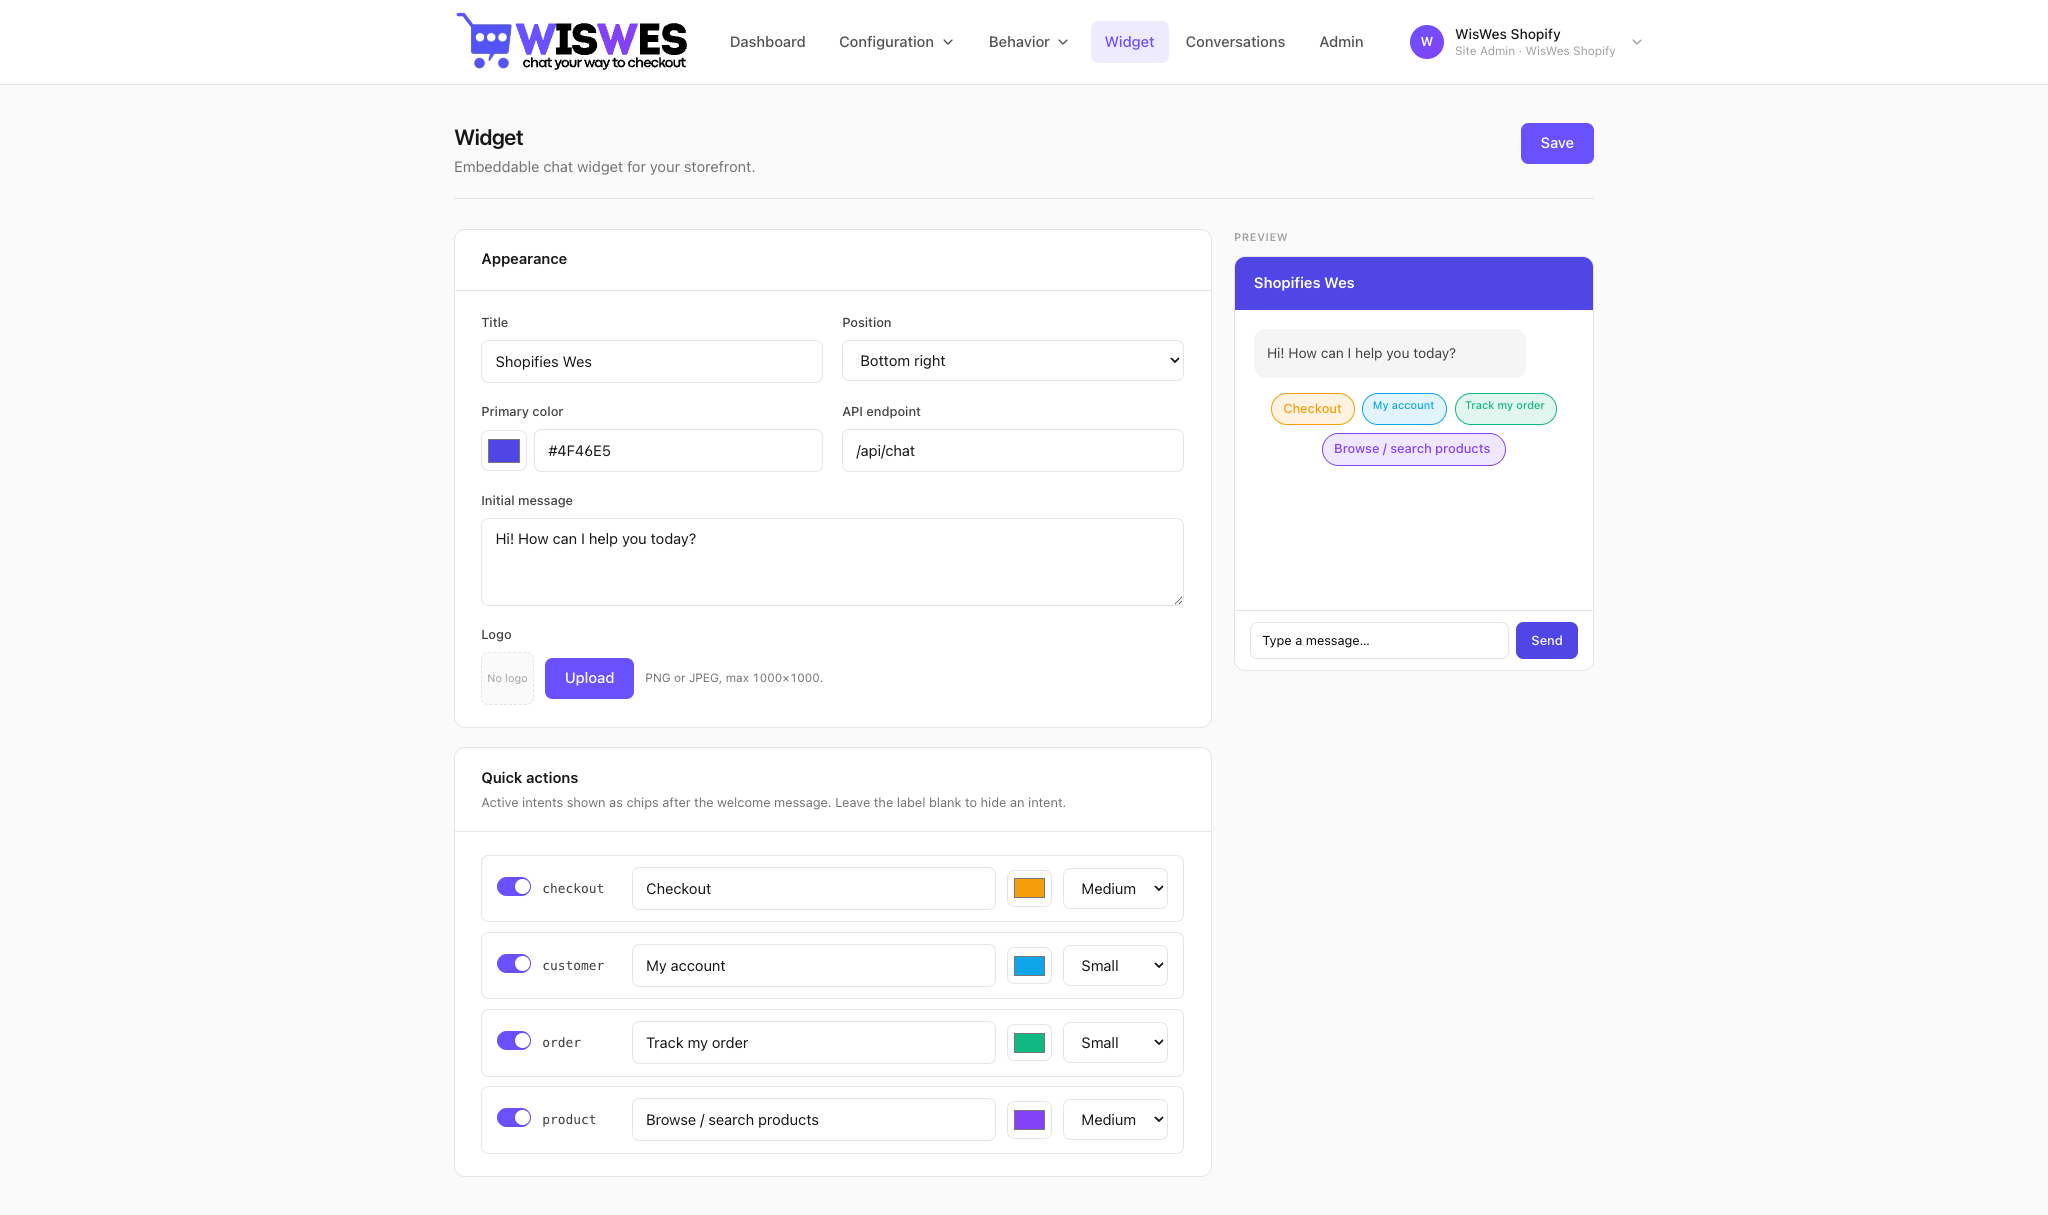
Widget configuration
Channels → Widget controls the chat bubble your shoppers see. Colors, position, greeting message, opening hours, proactive triggers, and the one-liner snippet you paste into your theme.
Install the widget
<!-- Paste before </body> -->
<script>
  (function(w,d,s,u){
    w.__wiswesConfig = { tenant: 'YOUR_TENANT_SLUG' };
    var j = d.createElement(s); j.async = true;
    j.src = u + '/widget.js';
    d.getElementsByTagName('head')[0].appendChild(j);
  })(window, document, 'script', 'https://cdn.wiswes.com');
</script>
On Magento 2 the module we ship does this injection for you — enable the widget inStores → Configuration → Services → Chat AI MCP → Widget and you're done.
Conversations UI
Observability → Conversations lists every chat between a shopper and Wes. Click a row to open the transcript + tool calls + products shown + outcome (purchased / abandoned / escalated). Flag a turn to feed training.
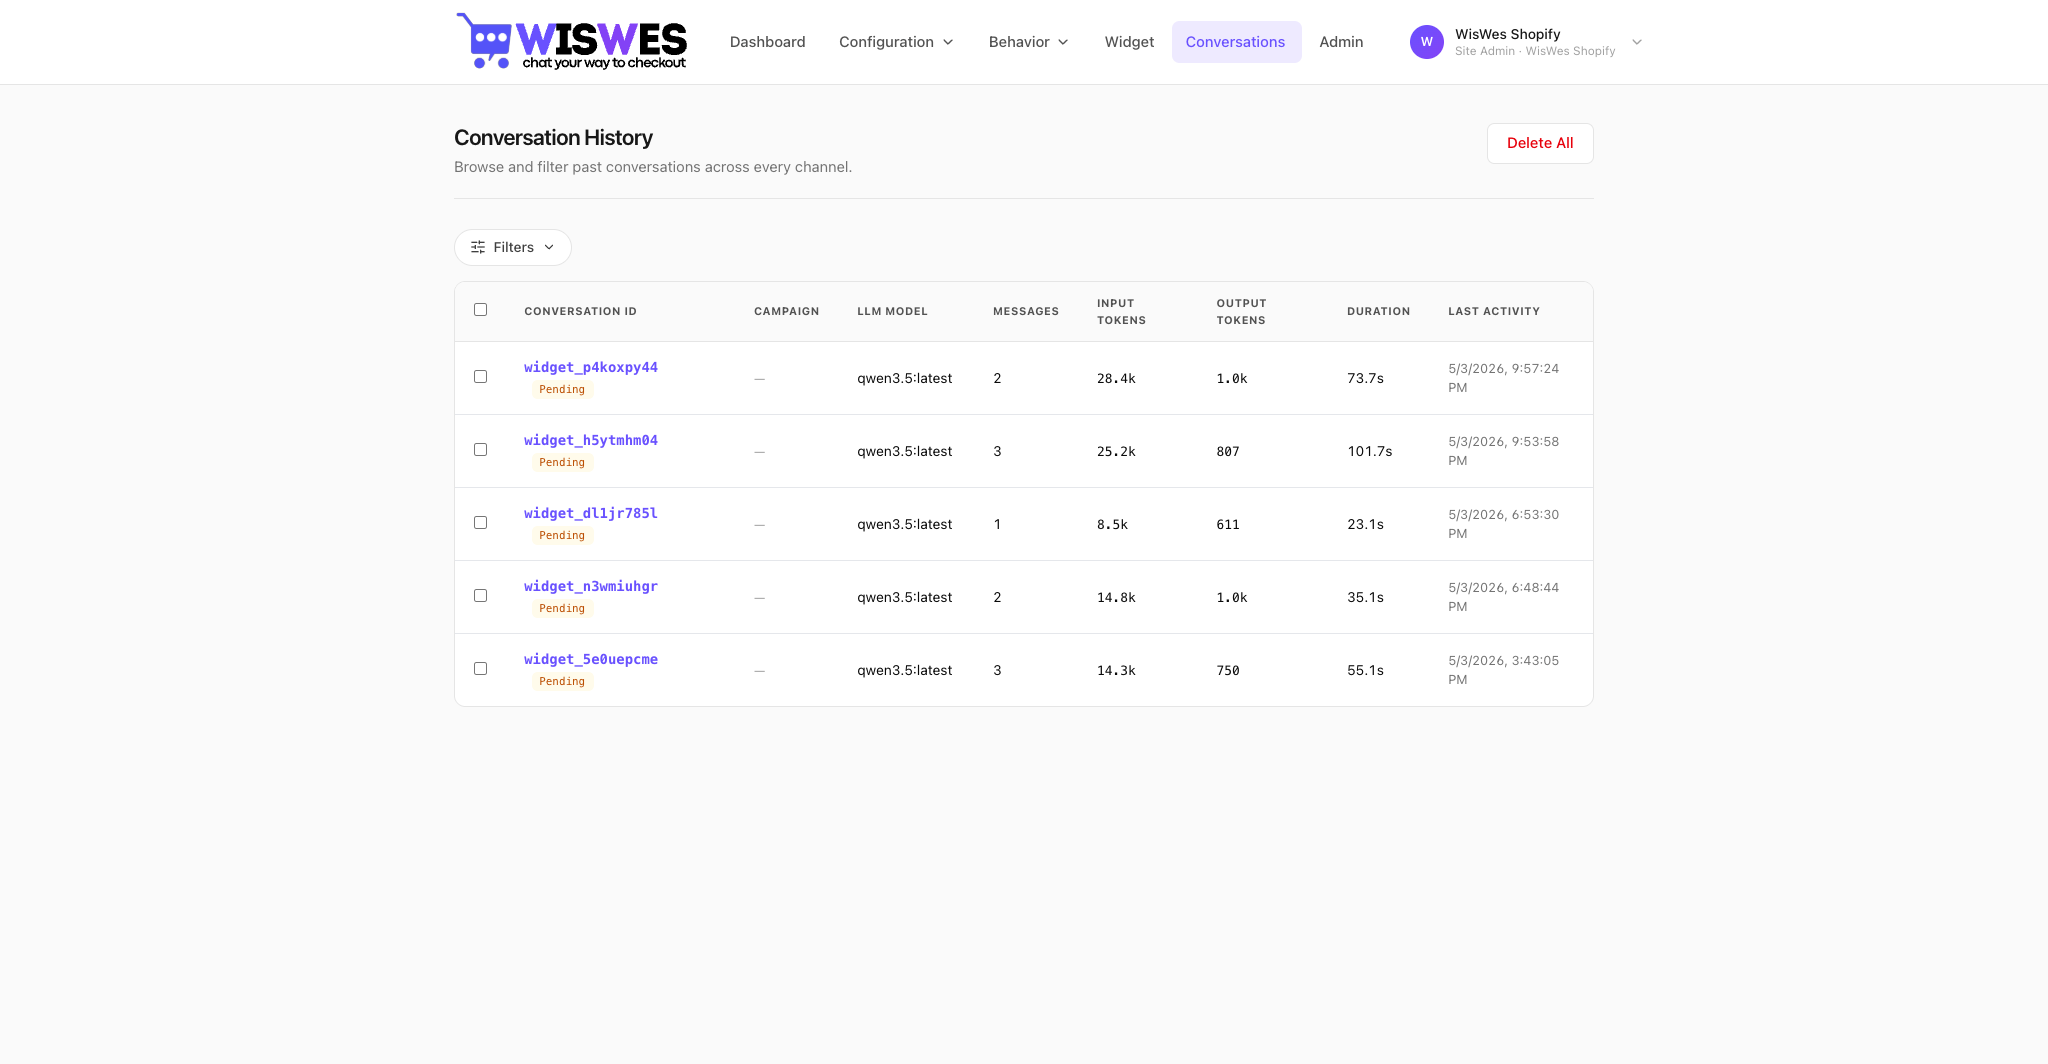
The transcript view
- Left pane — the actual chat as the shopper saw it.
- Right pane — the tool calls Wes made, their arguments, their results, and the turn latency each one contributed.
- Top bar — outcome + revenue attribution + which A/B variant was active.
- Teach Wes — correct any turn and the correction flows back into the next prompt compile.
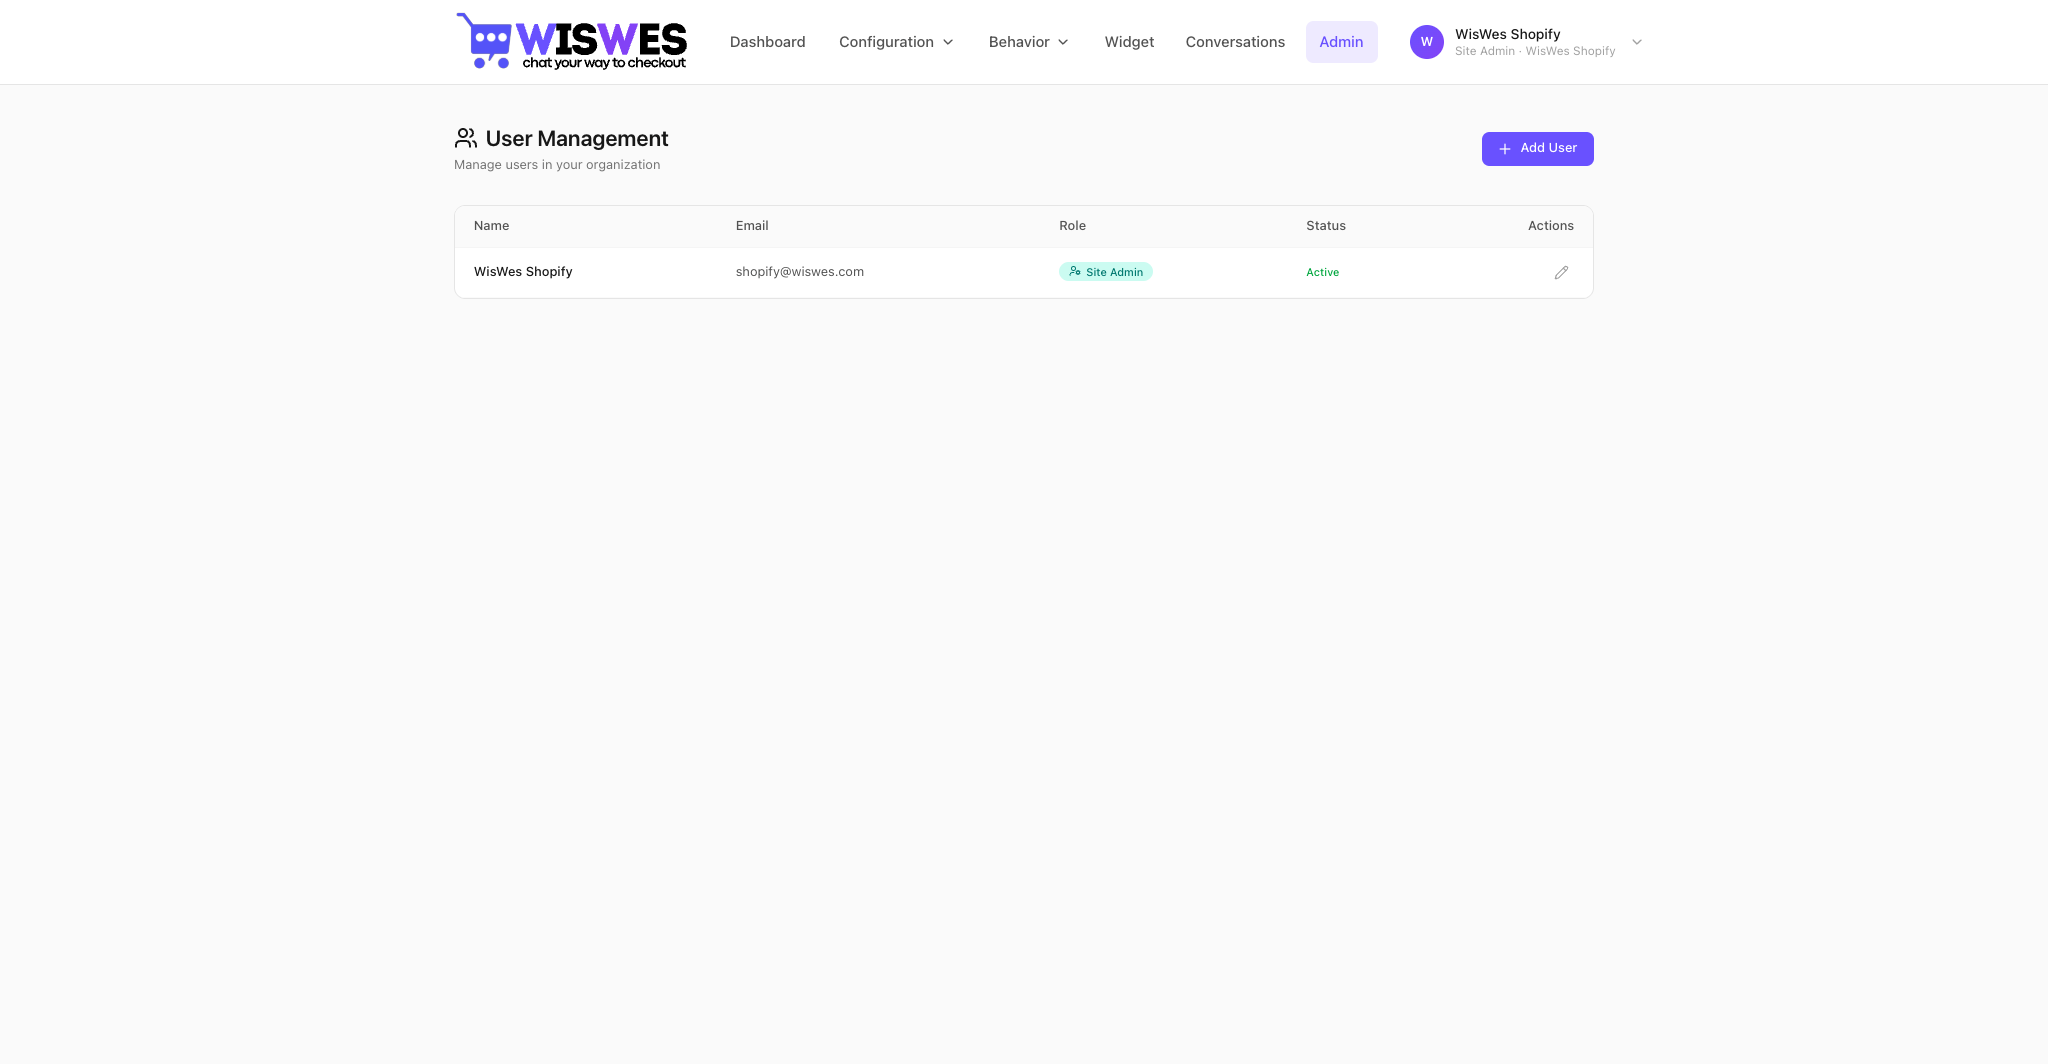
Users management
Administration → Users. Three roles:
- super_admin — cross-tenant, manages tenants, users, system configuration.
- site_admin — full rights inside their tenant (your store).
- user — read-only by default; permissions granted explicitly (e.g.
conversations.view,intents.edit).
Magento MCP — every built-in tool
The WisWes_MCP module (Composer package wiswes/module-mcp, source at github.com/wiswes/magento) ships 22 tools grouped into Catalog, Cart, Checkout, Customer, Sales, and Wishlist. See /install/magento for the full setup guide.
Catalog
product-filterLists up to 5 products matching equality filters and/or a free-text phrase. Backed by the storefront catalog search index (OpenSearch). Configurable parents are returned with child variant attributes (color, size) aggregated onto the parent at index time.
phrasestringoptional — free-text searchfiltersarrayoptional — [{field, value}] using attribute codes from product-filter-optionssortarrayoptional — [{field, direction?}] direction ASC or DESC
product-filter-optionsDiscover the filterable attributes and their valid option values. Always call BEFORE product-filter to learn acceptable field names and values.
product-infoFull product payload by SKU or numeric ID.
skustringrequired unless id is givenidintoptional — used when SKU is unknown
category-listCategory tree as a nested list.
rootCategoryIdintoptional, defaults to store rootdepthintdefault 2, max 5
Cart
cart-infoCustomer access token required (anonymous: pass cartId).Snapshot of the active cart — header, line items, totals.
cart-addCustomer access token required (anonymous: pass cartId).Add a product to the active cart. Supports all product types (simple, configurable, bundle, downloadable).
skustringrequiredqtyfloatrequiredoptionsobjectoptional — keys depend on product type
cart-updateCustomer access token required.Update quantity, apply a coupon, or remove a coupon.
itemIdintrequired for qty updateqtyfloatrequired for qty updatecouponCodestringoptional — apply couponremoveCouponbooloptional — set true to drop coupon
cart-removeCustomer access token required.Remove a line item by item ID.
itemIdintrequired
Checkout
checkout-shipping-methodsList shipping methods available for the cart given a destination. Call BEFORE checkout-set-address so the codes are known.
countryIdstringrequired, ISO-2 (e.g. "US")postcode / region / regionIdoptionalcartIdstringrequired for guest carts
checkout-set-addressSet billing or shipping address on the cart. Works for guests (with cartId) and logged-in customers.
typestring"billing" or "shipping"firstname / lastname / street[] / city / postcode / countryId / telephoneaddress fieldsregionId / regionint / stringone or the othercartIdstringrequired for guest carts (masked ID)shippingCarrierCode + shippingMethodCodestringrequired when type=shipping
checkout-payment-methodsList payment methods available for the cart. Magento exposes payment methods only after the shipping address+method are saved — call this immediately after checkout-set-address with type=shipping.
cartIdstringrequired for guest carts
checkout-place-orderPlace the order: saves the chosen payment method on the cart and finalizes purchase. Prerequisite: shipping address+method already saved.
paymentMethodCodestringrequired (e.g. "checkmo", "cashondelivery")cartIdstringrequired for guestsemailstringrequired for guests
Customer
customer_createRegister a new customer account and sign them in. Returns an access_token that authenticates the customer on subsequent customer-scoped tool calls. No auth required.
email / password / firstname / lastnamestringrequireddobstring Y-m-doptionalgenderint1=Male, 2=Female, 3=Not specifiedtaxvatstringoptional
customer-infoCustomer access token required.Profile, addresses, and most recent orders.
recentOrdersintdefault 5, max 20
customer-updateCustomer access token required.Update profile fields. Only provided fields change.
firstname / lastname / emailstringoptionaldobstring Y-m-doptionalgenderint1=Male, 2=Female, 3=Not specified
customer-address-listCustomer access token required.All saved addresses with default billing/shipping flags.
customer-address-updateCustomer access token required.Create or update a customer address (pass addressId to update).
addressIdintoptional — update vs createfirstname / lastname / street[] / city / postcode / countryId / telephoneaddress fieldsregionId / regionone or the otherdefaultBilling / defaultShippingbooloptional
customer-address-removeCustomer access token required.Delete a customer address by ID.
addressIdintrequired
Sales
order-infoCustomer tokens: own orders only. Admin tokens: any order.Compact order status + history + line items + tracking.
orderIdintcustomer modeincrementId + email + postcodestringguest mode (no token)
order-updateCustomer tokens: own orders only. Admin tokens: any order.Act on an order: add comment, hold, unhold, cancel, change shipping address.
orderIdintrequiredactionstring"comment" / "hold" / "unhold" / "cancel" / "shipping-address"comment + status + notifyfor action=commentaddressobjectfor action=shipping-address
Wishlist
wishlist-itemsCustomer access token required.All items in the customer wishlist.
wishlist-add-itemCustomer access token required.Add a product to the wishlist.
skustringrequiredqtyfloatdefault 1
Extending MCP — write your own tool
Every Magento tool is a plain PHP class with a #[McpTool] attribute. Drop a new class into Mcp/Tool/…, decorate a public method, and it appears in your WisWes workspace after a recompile.
<?php
declare(strict_types=1);

namespace WisWes\MCP\Mcp\Tool\Sales;

use PhpMcp\Server\Attributes\McpTool;

class OrderTrackingTool
{
    public function __construct(
        private readonly \Acme\ThreePL\Api\TrackingClient $client,
    ) {}

    #[McpTool(
        name: 'sales-track-order',
        description: 'Returns carrier + tracking URL for an order. Arguments: order_id (string).'
    )]
    public function track(string $orderId): array
    {
        $shipment = $this->client->getLatestShipment($orderId);
        return [
            'order_id'     => $orderId,
            'carrier'      => $shipment->getCarrier(),
            'status'       => $shipment->getStatus(),
            'tracking_url' => $shipment->getTrackingUrl(),
        ];
    }
}
The name becomes the tool id. The description is what the model reads when deciding whether to call it — be specific about each argument, what the return shape is, and when not to use the tool.
Deploying the module
# 1. Install via Composer (recommended)
composer require wiswes/module-mcp

# 2. Enable and compile
bin/magento module:enable WisWes_MCP
bin/magento setup:upgrade
bin/magento setup:di:compile
bin/magento cache:flush
The MCP endpoint is now live at https://<your-magento>/mcp, served by your existing Apache/PHP-FPM. Open Stores → Configuration → WisWes Chat → Install and click Install — Magento mints a shared secret and hands it to your WisWes tenant via redirect. Full step-by-step at /install/magento.